Saturday 20 December 2014

Grand Piano Cake for Grandad

After Beth's family saw her handbag cake they asked whether I would make a cake for her Grandads 80th birthday. With plenty of notice and a well thought out plan for getting it to the party venue (up Manchester way) I willingly agreed. They wanted a cake in the shape of a Grand Piano which sounded like an interesting challenge!


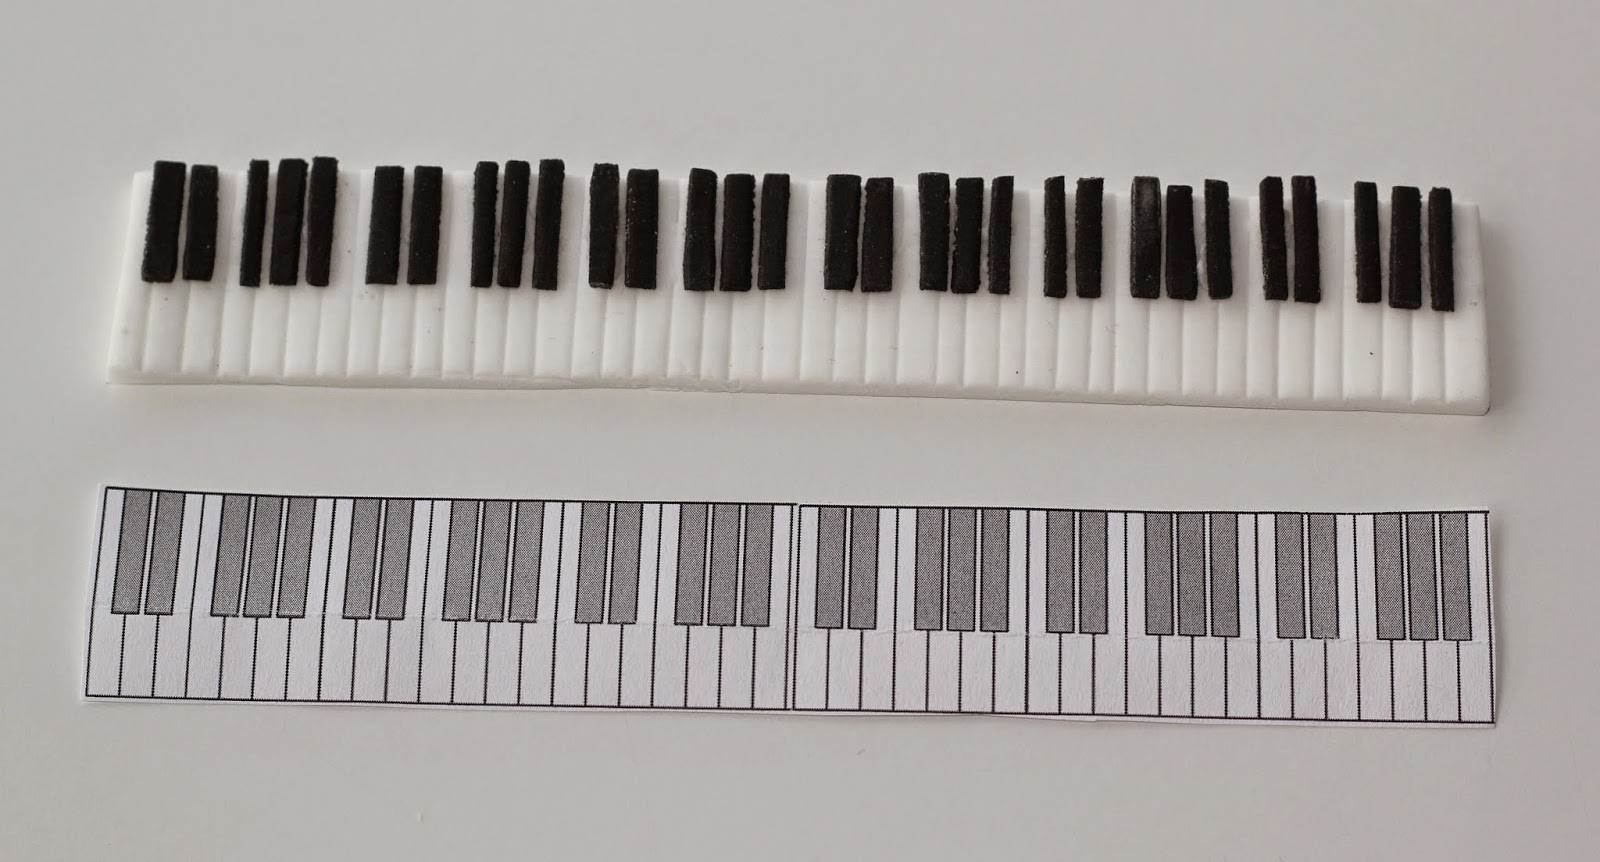
There wasn't a great deal I could prepare in advance but I did manage to make the keyboard, the pedals, the lid, lid prop and the sheet music stand. These were made in modelling paste to ensure they dried hard. I also ordered some 'Happy Birthday' sheet music printed onto rice paper and drafted Dave into painting three white pillars black with water-based modellers paint. 


I spent quite a while working on the design to make sure the proportions looked right. An oblong Madeira cake was carved into the curved piano shape and placed on a thin cake board cut using a sharp craft knife.


It all came together really well and Beth and her family were thrilled with the finished article. I think it is one of my favourites too.


Happy Birthday Barrie!

Sunday 14 December 2014

Tea for two

One week - three cakes to make and decorate. The difficulty was fitting it in around my full-time job. Anyway just after midnight on Thursday night all were done. Here's the first - my interpretation of Afternoon Tea on a cake. 


This birthday cake was for a friends elderly mother. Anne provided me with a image of the design she had in mind. I felt the pressure was on to match this. It must have been how my hairdresser used to feel when I turned up with a photo cut out from a magazine of a hairstyle I wanted created on my impossible to style thick wavy locks!! Thankfully her comment on seeing the finished cake was "it's better than the picture I gave you" which was a nice compliment. Here are a selection of photographs including close-ups of the finished article.


Moulding and assembling the individual components was quite time consuming but very rewarding. The crockery set was moulded from flower paste to ensure they held their shape and, once dry, were 'painted' with edible gold colour and edible felt pens to create the rose design. The scones were dusted with icing sugar and the cupcakes topped with royal icing rosettes to represent cream. Battenberg, little eclairs and sandwiches completed the selection. I used rice paper for the doilies on the blue plates, the 'Happy Birthday' topper on the large cake and the 'Afternoon Tea' menu. The lacy tablecloth was made using an Impressit embossing square and the frilly edge made with a special cutter. Time wise it probably took in excess of 7 hours to create!


I think I need a cuppa now.......

Saturday 29 November 2014

Gone fishing

Fishing is supposed to be a very relaxing pastime - I don't feel very relaxed at the moment as I am under pressure to get 7 cakes done in the next couple of weeks. That includes 4 Christmas cakes and 3 birthday cakes.


I've spent the last couple of weeks planning the designs, buying 'stuff' (cake boards, boxes and icing) and preparing what I can in advance - 1 cake down, 6 to go. I see a few long days ahead of me but however much pressure I'm under you'll never find me swapping cake decorating for fishing as a hobby!


Sunday 16 November 2014

It's in the bag .... v2 !

I have been thinking I could open a handbag shop......... a handbag CAKE shop that is! Here's my latest edible fashion accessory. 


Not to be outdone by his younger brother, Gareth asked me to make a cake for his girlfriend Beth like the Prada handbag cake I made back in August for Owen's girlfriend Lottie. Beth's choice of handbag comes in slightly cheaper than Lotties but you still wouldn't have much change from £900 if you went out and bought the real thing. For those in the know (or need to know) it's a Mulberry Bayswater Oxblood in natural leather!


I'm actually getting the hang of making these handbag cakes now - the important thing is to make the handles and any trim items as far in advance as possible, allowing time for the pieces to dry and harden up so they will hold their shape. For this cake I cut out two templates for the main leather sections from parchment paper. This was placed gently onto rolled out chocolate fondant icing and then cut around with a sharp knife. 

It's all in the preparation!


This is a lot easier than you might imagine - it's important to handle the rolled out icing as little as possible and to use icing sugar / cornflour sparingly as it will could take the shine off the finished 'leather'. Sit the cake, which has been carved to form the body of the bag, on the centre of the cross shaped fondant icing and pull all the sides up. Trim off any excess fondant and carefully 'glue' the edges together with a tiny amount of edible glue or water on a small artists paint brush. This chocolate flavoured fondant is actually a little oilier than white fondant but the colour and finish was a great match for the bag. Add any stitching markings before the fondant starts to dry. 


So what will the next request be for? A shocking pink Michael Kors, a monogramed Louis Vuitton or a even a limited edition Radley picture-bag .....who knows! I've learnt more about handbags in the past 3 months than in the previous 50 years but I'm still clueless as to what's on trend!

 Happy Birthday Beth! xx
(photo taken in low level light on a smartphone)

Sunday 9 November 2014

Macaron - the latest French revolution?

American style fancy fairy cakes have been popular in the UK for some time now with dedicated shops, cafes and supermarkets piling them high and charging upwards of £2 per cupcake for an item which is well within the capabilities of most home bakers. The French macaron (mac-a-ron) however is a trickier little morsel to replicate at home requiring patience and precision - so will a quiet french revolution be taking over the high streets any time soon?

Not bad for our first effort!

Gareth gave me a lovely book called 'Secrets of Macarons' by Jose Marechal for my birthday in October. Having read, and then re-read a number of times, the lengthy, step-by-step method and sourced all the ingredients Lottie and I finally set about making a batch last weekend. It took both of us most of Sunday to make them using nearly every bowl and utensil in the kitchen. Part way through I was seriously wondering whether life was too short to make macarons - like pasta and puff pastry - the shop bought offerings are so good is it worth the effort to make them from scratch?

The real thing - Macarons in Thonon-les-Bains, France (2013 trip post link)

The basic ingredients for the shells are -
200g ground almonds & 200g icing sugar (passed together through a fine sieve)
2 x 80g of egg white brought up to room temperature (some recipes state these should be separated at least a day before!)
200g caster sugar & 75ml water (to make Italian meringue which gives a better finish than French meringue!)
Vanilla / paste food colourings 

Already you can see this is no 'all-in-one-bowl' technique!  There's also a whole glossary of new french terms to learn.

So here comes the method - stick with it to the letter for perfect results!
  • Sieve the ground almonds and icing sugar together - called 'tant pour tant'. Discard any large nibs left in the sieve before blending to a paste with 80g of egg white.
  • Without stirring heat the water and caster sugar to the soft ball stage (110-115C)
  • Beat the remaining 80g egg white to soft peak stage before dribbling in the hot syrup mixture and beating for a further 10 minutes.
  • Carefully mix 1/3 of the meringue mixture into the almond paste to loosen it.
  • Add in the rest of the meringue mixture carefully with a spoon or spatula to end up with a smooth, uniform batter for piping - this fundamental stage is called 'macronage' - working the batter.
  • Divide the mixture. Add a small amount of paste colour if desired to each bowl.
  • Pipe out onto parchment papers (placed over circle templates - see photo)
  • Tap the tray on a table to knock out large air bubbles
  • Crucial step - leave to 'dry' for 1/2 an hour for the discs to form a crust - 'croutage' stage
  • Cook for approx 14 minutes at 150C
  • When cooked slide the parchment paper off the tray onto a dampened worktop

The pink and white shells were a great success with perfect little feet, the sign of a good macaron. The chocolate ones tasted great once sandwiched together with ganache but lacked finesse and had a more rustic finish! If the macarons are not allowed to rest for half an hour 'croutage/drying time' before cooking the tops will crack and there will be no 'feet'.


The next stage was to make the fillings and sandwich matching pairs of discs together. It was at this point I was starting to flag and the results show of 'Strictly Come Dancing' was calling me. I quickly made some pink butter icing, leaving Lottie making the chocolate ganache and a delicious salted butter caramel.


With each little mouthful costing around £1.50 in the stylish London patisserie shops I ask myself ......... was it worth all that effort? On reflection I think it probably was - they tasted delicious and, with practise, I'm sure we could cut down the time it took and the mess we made! I can see us working our way through the many variations in the book - pistachio, coffee, strawberry, lemon, hazelnut, honey......mmmm

              The book cover                  My artistic stack of macarons!


Saturday 1 November 2014

Countdown to Christmas

Halloween over - the shops will be all out now gearing up for Christmas. You can Google anything these days so typing in 'days to xmas' brought me to this 'Christmas Countdown' website. As of today, 1st November, there are 53 days to go....eeeks. So without further delay, having taken the family orders, I prepared to make a catering size batch of Christmas cake mix. Overnight I soaked the raisins and sultanas in brandy and orange juice, I'm not a great fan of currants so they didn't make it into the mix!


I mentioned this versatile cake tin before in the post about my sister Sue's oblong shaped Suitcase cake and I set the dividers so that I would end up with 4 x 6" cakes. For years I've used the same rich fruit cake recipe from my well thumbed 'Special Occasion Cakes' book with just a few omissions and additions. I leave out prunes, bought mixed peel (yuk) and walnuts and add in the zest of fresh oranges and ground almonds. The massive mix consisted of 2.3kg dried fruit, 350g cherries, 275g ground almonds, 675g Stork, 600g dark brown Muscovado sugar, 725g flour, 4 oranges, a very large splosh of brandy, 4 tsp spices, 12 eggs, 5 tbsp marmalade and 3 tbsp black treacle. The sugar and treacle give the cake a lovely dark colour - I remember in days gone by adding gravy browning, do they still make gravy browning?


The problem with making this much cake mix is finding a bowl big enough to mix it in - I had to resort to using one of those 'Really Useful Boxes' which lived up to it's name.


After five hours in the oven on a low heat the cakes were cooked and after cooling down were ready for the first of many 'feeds' with brandy. Here's a few xmas cakes from previous years - watch this space to see what designs we go with this year!


Sunday 26 October 2014

Give it a whirl...

I can't believe it's 6 weeks since I started on the Patisserie and Confectionery course at Richmond College - where does the time go? In the first 5 weeks we tempered chocolate, made enriched doughs, fondant puddings, Tarte au citron, doughnuts and different varieties of bread. This week we were allowed 'free choice' to make any type of biscuit and I chose to make Viennese Whirls.


It's been years since I've made them and I'd forgotten how easy they are to make. It's also been years since I've eaten them and I'd forgotten how yummy they are too - buttery, crumbly and melt in the mouth. I last made them in secondary school during 'O' level Cookery lessons. I remember every week setting off from home on the school bus with twin sister Sue with ingredients stuffed into our gingham covered wicker baskets together with a tin to bring back our wares! The bus trip took half an hour and as soon as we got on the bus to go home we would devour whatever we had made. Mum and dad were ever hopeful there might be a crumb or two left but there rarely was! 


My trusty 34th edition of the Be-Ro Home Recipes book, which we used every week in school, dates back to the mid 70's, is still in my collection and features Viennese Fingers and Rosettes. The  recipe I used for this batch though was a more recent one from the Hairy Bikers on the BBC Food website.

Ingredients
250g very soft butter
50g icing sugar
250g plain flour
50g cornflour
1/2 tsp pure vanilla extract

Method
Sieve the icing sugar, plain flour and cornflour into a bowl with the soft butter and vanilla
Mix together with a spoon first before whisking or blending to a smooth paste
Pipe into different shapes - swirls, fingers or double 'S' shapes onto baking paper
Bake for 12 - 15 minutes at 190, allow to cool on the tray for a couple of minutes
Transfer to a cooling rack
Sandwich together with butter icing and jam or dip in melted chocolate
Dust lightly with icing sugar


Over the last few weeks we've worked out the college is running on a very tight budget and we have resorted to bringing in some of our own ingredients, in a rucksack - not a wicker basket sadly! The payback is that we get to bring home the goodies we make every Tuesday evening and, as I now have a little more self-discipline, not everything I make gets eaten before I get home! I take a plastic box with me and my family and work colleagues are actually getting to taste my creations!


Sunday 12 October 2014

Practice makes perfect

Although they are a family favourite I've never made doughnuts before. I don't know why that is, what's not to like about them?


This coming Tuesday we will be making them on my evening course so I felt the need to have a practice beforehand. I've quickly come to the realise on this course that it pays to read up, and if time allows, have a trial run with whatever it is we are going to be making. 

Doughnuts Mark 1, although tasted fine, wouldn't have won any prizes for looks or presentation.

Doughnuts Mark 1
So learning from the mistakes we (it turned into a family effort - mixing, shaping, frying, dusting in sugar and injecting the jam!) had another go and I am pleased to say doughnuts Mark 2 were a great success. 

I followed a Paul Hollywood  recipe on the BBC which is very straightforward. I think it helps to have a sugar thermometer (ours is still packed in a box somewhere) to ensure the oil is at 180c, as we ended up guessing when we were at the right temperature, which wasn't ideal. So I'm feeling a little more confident going into Tuesday's lesson now knowing how best to cut the shapes, manhandle them after proving and frying to the right colour.


If only I had known how to make these when I was younger - they were Dad's favourite. He was always having 'secret' doughnuts but he generally forgot to hide the evidence of the sugary bag! This one's for you dad.... xxx

Doughnut Mark 2
 

Sunday 21 September 2014

Week 1 - Tempering Chocolate!

When I said last week I was looking forward to tempering chocolate I didn't think it would be the first thing we attempted on the course. I felt a little like the underdog on a talent show and came away feeling like I needed to up my game to keep up with my colleagues and stay in the competition. We were a small group of mixed nationalities and abilities - I'm really looking forward to learning alongside them.


I may have looked the part kitted out in my loaned chef's whites but I struggled to master the technique of tempering chocolate on my first attempt - never mind practice makes perfect and I'll try and master it at home. I suspect the equipment list for this course could be endless and turn out to be a bit expensive - thermometers, acetates, good quality ingredients ... this 5kg bar of 54% cocoa solid dark chocolate, for example, costs about £40!


After tempering the chocolate (heating and cooling to specific temperatures - more science in the kitchen) we spread it onto acetate sheets to create a freestanding shape, which needed to set hard in the fridge. This was later filled with a chocolate mouse and decorated with chantilly cream and piped decorations. I think I will blog more about the technique when I feel a little more confident at it.

My first attempt - bit of a mess in all honesty!
What's the old saying - less is more?
My tempered milk chocolate teardrop shape was nowhere near as shiny and impressive as Steve's dark chocolate marbled cylinder, In my defense he runs his own bakery business, trained in professional kitchens and has worked for Gordon Ramsey in the past. He's going to be the one to watch and was definitely our 'star baker' this week!

Steve's masterpiece